Chatterbox Quilts' Blog - Chatterbox Quilts

Build your free motion quilting confidence!

Free Motion Quilting

Learning From Gammill Quilt Artist, Sharon Blackmore

I recently had the opportunity to interview Gammill Quilt Artist and long arm quilter extraordinaire, Sharon Blackmore of Love Shack Quilts, Sharon is a local long arm quilter, specializing in custom quilting, and is the host of the Prairie Quilt Militia and How do I Quilt This? Facebook group.

 
Ki and Sharon Blackmore sitting in front of Tula Pink City Sampler quilt
 

Sharon has been free motion quilting for about 20 years and long arm quilting (always on a Gammill) for about 12 of those years. Her secret to her amazing quilting is that she quilts every day. Yes, practice definitely makes progress towards perfection!

 
Tula Pink City Sampler quilt pieced by Sharon Blackmore and quilted by Jason Blackmore using civil war reproduction prints
 

Sharon loves to challenge herself and this is also how she has improved her skills over the years. She believes that it’s important to challenge yourself and try projects outside your comfort zone to improve your quilting skills. Recently she has been quilting on leather and cork and the results are incredible!

As a Gammill Quilt Artist, Sharon has been teaching in Canada and the US on the Quilting with Confidence tour. Sharon loves teaching and appreciates the opportunity to learn from the other Gammill insructors on the tour.

 
The Rebel, designed and quilted by Sharon Blackmore

The Rebel, designed and quilted by Sharon Blackmore


Click on the image below to learn more about Sharon and her quilting journey.

After we filmed this interview, Sharon and I recorded several more videos where Sharon shared quilting tips and advice on free motion quilting and went in-depth on how she quilted several of her quilts. These videos are available exclusively for members of The Quilter’s Way. Not yet a member, check it out here.

Click here to learn more about the Prairie Quilt Militia and the How do I Quilt This? groups.

Creatively,

Kim's signature small aqua.jpg
 

P.S. Are you serious about improving your quilting? Do you want to connect with other committed quilters in a supportive, safe environment?  If you answered “yes” to these questions, you need to join The Quilter’s Way. The Quilter’s Way is the only quilting membership site that includes both training and an active, supportive online community. Don’t wait another day! Join now.

P.P.S. Did you know that you can sign up to receive emails full of FREE quilting goodness? Click here to receive FREE content directly in your email inbox every few weeks from Chatterbox Quilts. I know you'll be glad you did!

P.S. I am an Amazon affiliate and, if you purchase items by clicking through the links in this post, I will receive a small amount of commission. This doesn’t cost you any more $$$, but helps me to continue creating free content for you. Thanks!

How to Bury Your Quilting Threads

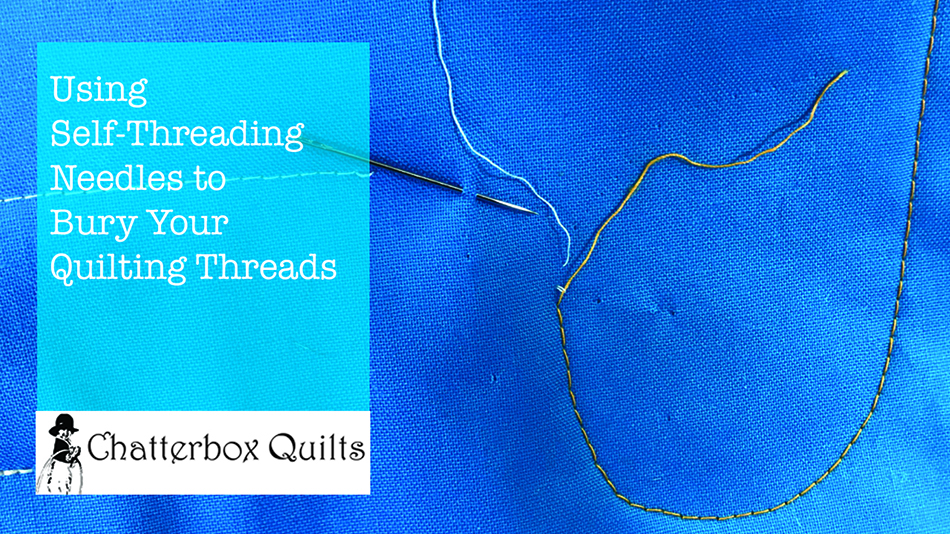
Want to learn an invisible way to end your quilting stitches? I have a secret weapon: the self-threading needle.

If you haven’t heard of a self-threading needle, it doesn’t really thread itself, but it’s the next best thing! A self-threading needle has an open part at the top which allows you to snap the thread into it so you don’t have to struggle with getting your thread through a tiny eye. This notion comes in so handy when you want to have an invisible end to a line of quilting.

Now, in all honesty, I have to say that I don’t always bury my threads. If I’m able to start and stop my quilting stitches off of the quilt top - in the batting and backing - I’ll do this and there’s no need to lock my stitches, but, if it is a special project or show quilt, burying your threads is a must and this is where the self-threading needle comes in.

In order to have an invisible end to your quilting stitches, you need to leave additional top and bobbin thread to work with. You’ll take these threads and know them about 1/8” above the quilt top. Next you’ll take the thread tails and snap them into the top of the self-threading needle. Once they’re in, you will slide your needle back into the quilt sandwich, trying to go back in at or near the last stitch. Don’t take your needle all the way through the quilt - you just want to go into the batting. Slide your needle along inside the quilt sandwich and pop out about 2” away from where you entered it. Give a quick little pull on the thread and you should hear it “pop” into the quilt sandwich. You can now cut off your thread ends close to the quilt top.

See, I told you it was easy! For more information, click on the image below to see a video of how I bury my quilting threads.

This leaves such a nice finish to your quilting stitches, but it does take a bit of extra time. If you haven’t tried burying your quilt stitches, why not get a self-threading needle and give it a try?

Creatively,

Kim's signature small aqua.jpg
 

Download the free Get Out of the Ditch! guide to learn how to start free motion quilting by clicking here.

Note: I am an Amazon affiliate and, if you purchase items by clicking through the links in this post, I will receive a small amount of commission. You won’t pay any more $$ for these items, but it will help me to continue creating free content for you. Thanks!
P.S. Do you want to join a supportive group of quilters who are all working to improve their quilting? If you answered “yes” to this question, you need to join The Quilter’s Way. The Quilter’s Way is the only quilting membership site that includes both training and an active, supportive online community. Don’t wait another day! Join now.

P.P.S. Did you know that you can sign up to receive emails full of FREE quilting goodness? Click here to receive FREE content directly in your email inbox every few weeks from Chatterbox Quilts. I know you'll be glad you did!

Quilting Before You Appliqué

I like to do fusible web appliqué or raw edge appliqué. It’s easy and fast, but the part I don’t like about it is quilting it. I don’t like having to work my way around the appliqués on the project. If you are doing a design such as crosshatching, having to stop and restart your quilting around the appliqué pieces can be quite time-consuming.

Why not quilt the background first and then add your appliqués to it? There are times when this method would work very well – and other situations where it might not be appropriate.

If you are doing a small, simple project, you may want to consider quilting it first then adding the appliqué. One consideration of quilting first and appliquéing later is that you will have to put the quilted project into your sewing machine to finish the edges of the appliqué pieces. If you are working on a small project, this shouldn’t be a problem.

If your project has embellishments, such as hand embroidery on it, this probably isn’t the best choice. The hand embroidery really needs to be done on an unquilted surface – it just isn’t as effective if you are embroidering over a quilted area as the two techniques will compete with one another and detract from the overall effect.


This method of quilting first and appliquéing second wouldn't work if you were wanting to accent the appliqué. In this situation, you usually densely quilt around the appliqué, pushing down the background fabric which allows the appliqué to pop. Obviously, the appliqué would have to be on the quilt already so you could quilt the background around it.

If you are making a big project, this method might work if you are using a quilt-as-you-go method. You’ll be quilting a section at a time and adding the appliqués a section at a time as well, so again, you won’t have a large quilt to maneuver through the throat of your sit-down sewing machine. 

If you have a large project that is going to be all quilted first, this method probably isn’t your best choice either. Once you had quilted the sandwich, you would then have to add the appliqués and finish the edges which means working that large, quilted project through the machine throat. While this is difficult enough, you may find that the appliqués not yet stitched down may lift off as you move the quilt around.


If you want to try this method of quilting first and then adding your appliqué pieces, keep these situations in mind and choose the one that will work the best.

Click on the image below for more information on when it’s okay to quilt first and appliqué last.

Have you ever tried this technique? Leave me your thoughts in the Comments below.

Creatively,

Kim's signature small aqua.jpg
 

Download the free Get Out of the Ditch! guide to learn how to start free motion quilting by clicking here.

P.S. Do you want to enhance your quilting and become the best quilter you can be?  If you answered “yes” to this question, you need to join The Quilter’s Way. The Quilter’s Way is the only quilting membership site that includes both training and an active, supportive online community. Don’t wait another day! Join now.

P.P.S. Did you know that you can sign up to receive emails full of FREE quilting goodness? Click here to receive FREE content directly in your email inbox every few weeks from Chatterbox Quilts. I know you'll be glad you did!

Don't Compare, Create!

Don't Compare, Create!

The thing about comparison is that there is never a win. How often do we compare ourselves with someone less fortunate than us and consider ourselves blessed? More often, we compare ourselves with someone who we perceive as being, having, or doing more. Although I sometimes struggle with social comparison in my everyday life I make a conscious effort to avoid it in my quilting because of its effect on my enthusiasm and creativity for quilting.